Thursday, October 6, 2011

Tealights

 Tea-hee

Hey hooooo. What's up? I love when I bumbling around online and find a pretty picture of a teacup that's been made into a candle, and thought, dude, I can make that :).

I found this lonely little teacup at my local Savers store and have been holding onto it until I gathered the necessary supplies. Any mateless teacup, an empty shot glass, or crazy martini glass will work as well. Skies the limit.

Unfortunately you'll need a number of items to complete this craft, such as:

Candle Wax (Available at most craft stores, comes in regular, gel, soy, scented etc)
Wicking and Wick Tabs (Unbeknownst to me wicking comes in different thicknesses. I accidentally got the extra large kind, but it comes in XSmall, Small, Medium etc. Look on the package and it'll tell you what size candle goes with what size wick. The tabs are one size fits all, you can also get pre-tabbed wicks in varying lengths.)
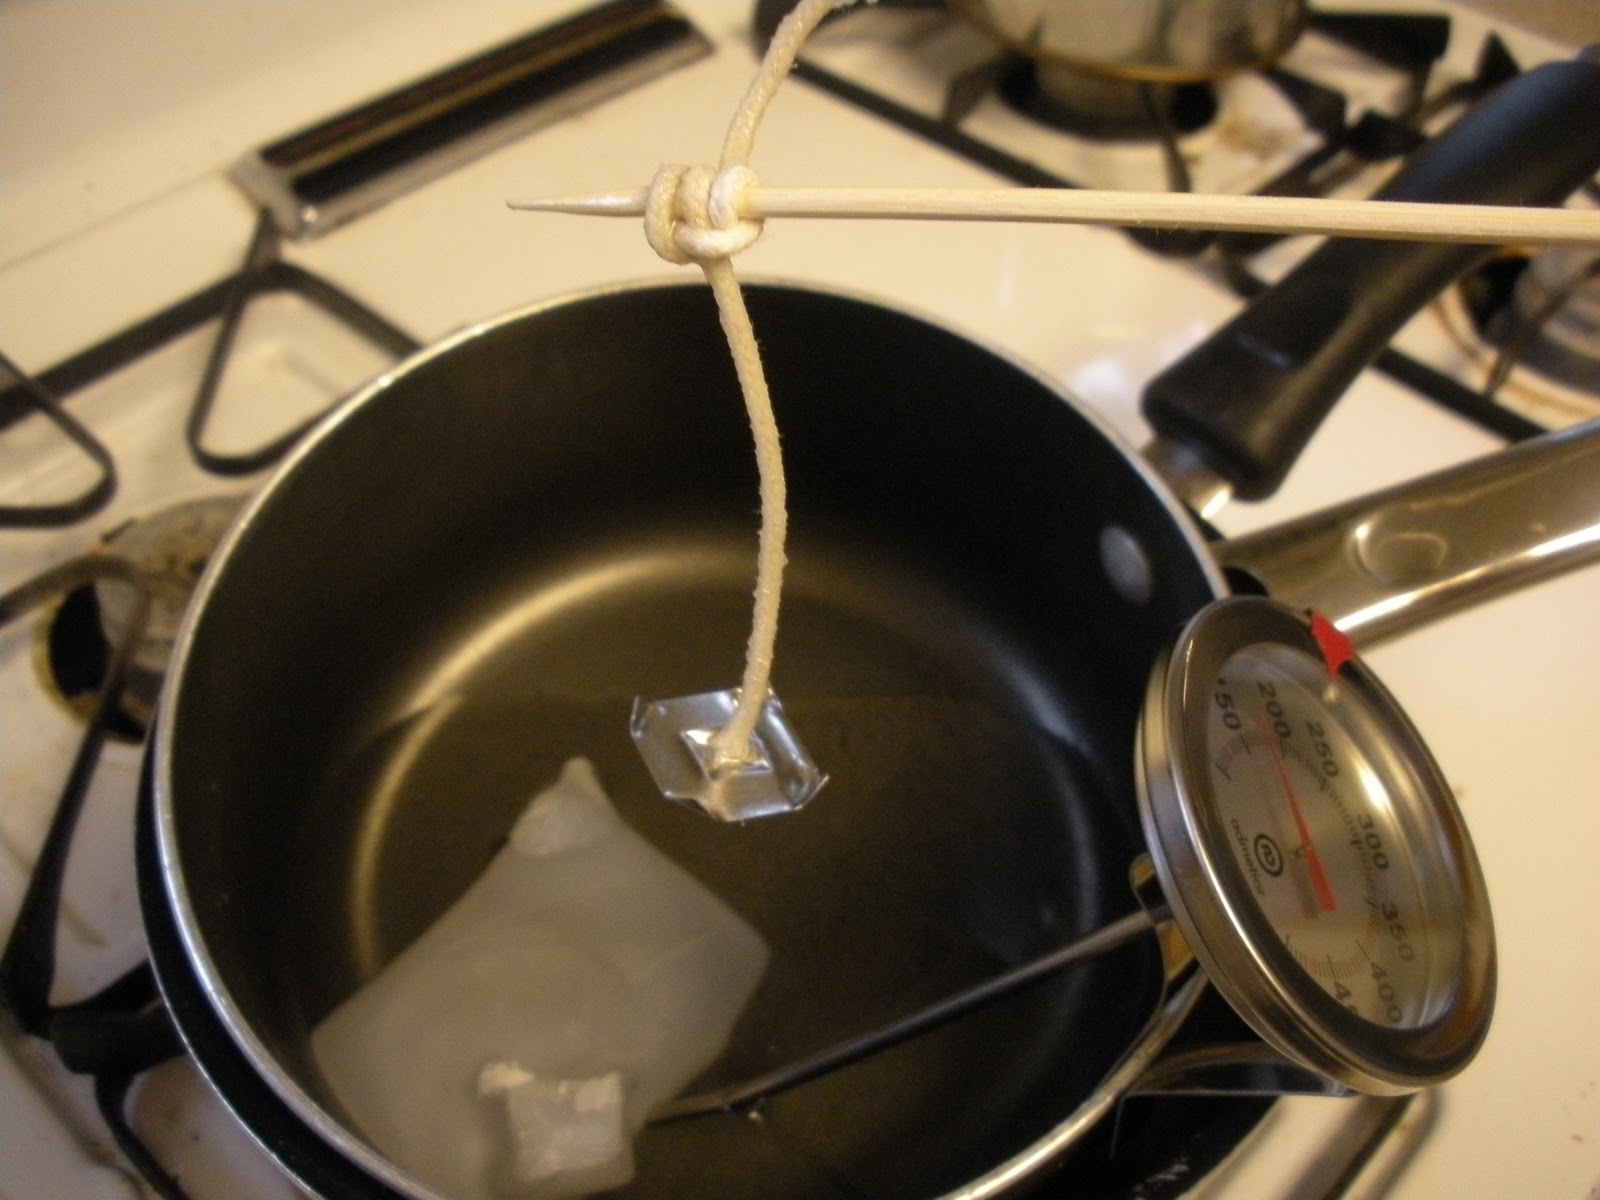
Candy or meat thermometer (Has to go up to 300 or 400, you need this to monitor the wax when it's being melted so it doesn't burst into flame. Important because bursting into flame is unpleasant.)
Wax mold (You can buy preshaped rubber, metal, porcelain or waxed paper molds, or just make your own! I'm going to do another post on pillar candles made from toilet paper tubes and cookie cutters. If using a mold you plan to take the candle out of, just coat the inside with some non-stick cooking spray.)
Scents (I'm using lavender for this bad boy, but any non-flammable scent will work.)

Les accoutrements des candles.
Step one: Set up a double boiler. This is to prevent the flame-bursting thing we were talking about before. Fill a large pot 1/3 of the way with water, plop another pot in the larger one and turn on the burner. Make sure the water doesn't look so high it'll boil over, but high enough so that it cups the bottom of the inside pot. Set the thermometer in the smaller pot and put the wax in it to melt. The wax packaging will tell you how hot to let it get, PAY CLOSE ATTENTION TO IT AND DON'T LEAVE THE ROOM. Fires are a bummer.

Please don't look at my gross stovetop.
Step two: When the wax is melting, prepare your wicking. Measure your teacup and cut the wicking so there's a couple extra inches, and trap one end in a metal wicking tab. Tie the loose end around a stick and place across the top of your container. Make sure the metal tab can sit comfortably at the bottom, but the wicking is straight up to the stick so that the flame burns straight down, not all willy-nilly like some kinda drunk candle.


El Steppo Tres: When a little bit of the wax has melted, push the wicking to the end of your stick and immerse it in the melted wax, covering the wicking and the metal tab.


 Hot, yo.

Place it back in the candle so the tabs on the bottom, and pour a tiiiny bit of hot wax on the bottom. Place in the freezer for a minute to set it. This helps keep the tab at the bottom and the wicking nice n straight.


 Brrrr. It's cold in here. I must not be lit yet.

When the wax has gotten all melty, CAREFULLY pour it into the teacup until it reaches about a 1/2 inch from the top. This is when I add the scent I'll be using, in this case lavender. I added about 8 drops, but go as crazy as you like. As the wax cools it'll leave a little depression in the middle that you'll have to fill in with more wax, so keep a little in the pot.

 I'm depressed.

Let it cool, about fifteen - twenty minutes, then pour a leeeetle bit more wax in until it reaches about a 1/4 inch from the top. Let cool again. I wouldn't put it in the freezer this time, if it cools too quickly the wax can split and ruin your whole project. Be patient. Go have a beer.

Pwetty.
Slide the stick out and trim the wick to a 1/4 inch.

 Tadaaaaa!

Light it up and bask in the glorious fiery burnination.

I feeeeell intoo a burnin' teacup of fiiiiire! I went doooown, dooown, dooown, 
and the flames went... not really all that much higher...
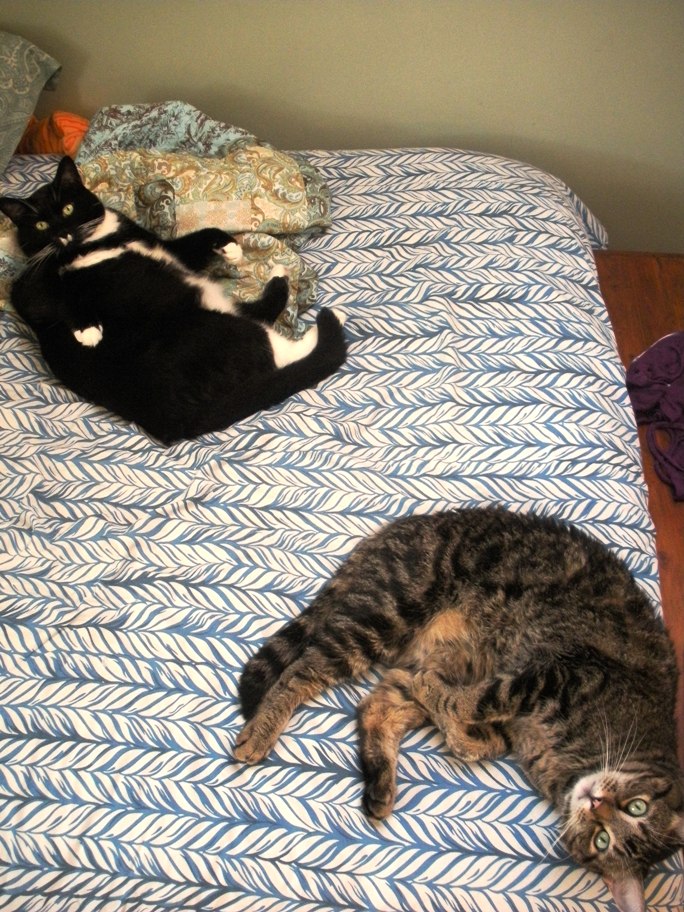
Also? Pretty paws.

Wednesday, September 21, 2011

Don't forget to bring a towel!

When you're a crafter, y'save stuff... Waaay more stuff than you should save. Pieces of fabric, paper towel tubes, anything that can be repurposed into something else. I've been holding on to this depressing little towel for awhile, waiting to find a pretty and super useful thing to turn it into. What kind of thing, you ask? Why other, smaller, towels of course!
This post has a lot of pics, so bear with me...
First I'd like you to meet my sewing machine, Big Bertha. Isn't she perty? Made in the 1985, so she's almost as old as I am :).

Seeeew, come here often?
My little scrap of a towel. I took the total length and divided by three, so that I could squeeze three little towels out of this one regular sized one.


It helps a lot if you have a cutting mat used for quilting, but as long as you measure all the sides of the towel carefully you should be fine. I folded the towel in half so I'd just have one shorter cut to make instead of a much longer one. It helps keep the cutting line straight as well.


I lined up the bottom and right edge of the towel as evenly as possible with the markings on the mat. Then measured 15" from the right side because that's how wide each of the little towelettes are going to be. Laying the ruler across the fabric, trying to keep it from shifting underneath, I lined up the right edge of the ruler with the markings on the mat so that I get 15" from the right side of the towel on both the top edge and the bottom.


 Try to get it as close to perfect as possible, but don't worry, no one will be able to tell if the lines are off by a quarter of an inch or so. Mark the line with a pencil, it'll come off in the wash.


Do some hand stretching stretches, 'cause cutting through the thick fabric of a towel will send you into convulsions. Also helps if you have super sharp fabric cutting scissors.


You should have a couple of same-ish sized little towelettes.

 Is it weird to be proud of cutting up towels nicely?

Tuck the raw edges in on themselves, using as little fabric as possible. Because this towel is so thick I had to fold over about an inch of fabric. You can leave the raw edge exposed though, because we're going to sew right over it, covering it up.

 Keep track of your pins... Seriously... Because they're sharp... Because they're pins.

Set the sewing machine to a straight stitch setting a the skinniest stitch allowance (See following two pics). We're going to sew only a 1/4 inch or so at this length to lock in the ends of the thread, then switch to another stitch. Lemme esplain...


The skinniest stitch setting is all the way to the right (On Big Bertha at least), and the widest is to the right. That's used mostly for zigzag stitches and other crazy embroidery stitches, we're only going to use the zigzag and the straight stitch this time.


Center the needle right above the line where the raw edge of the fabric is, and clamp the presser foot down.

To lock down the end of the thread, sew a straight line using the straight stitch for about a 1/4 - 1/2 an inch. When you've reached that point, sew veeery slowly until the needle is down all the way into the fabric, put the machine into it's reverse sewing setting, and sew back on top of the line you just made. When you've gotten  back to the original starting point of the sewn line, put the needle all the way down into the fabric again, and stitch forward through the same line again. This will anchor the thread and keep it from pulling out without having to tie a bunch of little annoying knots.

 When you've gotten to this point, switch the setting to the zigzag stitch, and make it the widest stitch possible. See the following two pics.


Using this stitch, sew down the line of the raw edge of the fabric, making sure the wide stitch covers the raw edge on both sides. Make sure to switch back to the straight stitch at it's narrowest setting to lock the thread down when you reach the end.

So fwuffy.

You should have a lovely set of matching towels to adorn your boudoir.

 Make sure to have plenty of cats on hand for emergencies.


Tuesday, August 23, 2011

Spilt milk

Here's a teeny little post just for fun, to tide you over until the next craft.

I'm always looking for ways to bust my glass stash, as I think it creeps people out when they see my piles of booze bottles and pasta sauce jars on the porch. We also have a lovely selection of paint cans in various stages of rust-ation as our apartment has been painted quite a few times. So combine the two and what do you get? Milk glass!

Stage one: take a piece of glass with a pretty shape, clean it out nicely and dry off completely.


I may also mention that I'm a bit of a antique glass junkie. I love Victorian style beauty supply bottles, and anything referencing sugar or sweets. This particular bottle I picked up at the Brimfield Antiques Fair, or as I like to call it, the Hoarder's Candy Store. It's hard to see but it says Fellows Compound Syrup; not the most delicate example of antique glass, but hey if it mentions syrup, I'm buying it.

Stage two: Pour a small amount of paint (I prefer latex because it cleans up easily) in a party cup or disposable container. You can also use a measuring cup if you feel like cleaning it later. I do not.

Stage three: Carefully pour the paint into the jar/bottle, and turn it over and over until the paint coats all the surface on the inside. When coated, pour the excess paint out of the bottle/jar into the trash or some other receptacle. Whip the rim to get rid of excess paint with a damp cloth. Let dry.

Stage four: Enjoy the glorious fruits of your labor.


Monday, July 25, 2011

Tie Dye For

In the true crafting spirit of the summer, I decided to partake in a little tie dye this weekend. As I don't have a yard or front porch device at my apartment, my lovely sister let me borrow hers for the project. I don't suggest working with dyes inside the house, I've done it before and apparently they actually change the color of some things...

 This shirt is way too nice, let's rough it up a bit...

Start with one shirt (Pillowcase, dish towel, etc), generally it's a good idea to start small so it'll fit into the dye bath easily. Pick a color, I usually default to blue cause it's my favey, but anything's fun.

 Don't drink the waateeeer...

Boil some water and let it cool a little bit, hot water makes the dye seep in better. You could measure how much water per dye packet you're supposed to use, but it always seems to turn up kind of faint when I do this. I boiled a pot of water, and mixed one packet in. You can use less than that, but at least this way the dye will definitely make a mark.
There are lots of fun ways to tie your shirt up, folding in on itself like an accordian, scrunching it up all crazy like, rolling it up from one end and wrapping it in around itself. I went for the classic spiral look, pinching it in the middle and twisting. Observe.

 Ow! You're pinching me!

Doesn't have to be perfect, the funkier the twist the cooler the design.

 Like a record baby, right round round round

Get it nice and tight, the more compact the bundle is the less dye will seep into the middle and the more contrast you'll have between the colored and the undyed white parts.


When it's all bundled up and rubber banded, soak it in water (Not the dye bath) for a few minutes. The dye seeps into cloth easier when it's wet, so squeeze it a couple of times when it's under the water to really get into all the corners.
Plop that bad boy in the dye bath and make sure it stays totally submerged, I weighted it down with a rock that my sis donated to the cause.

I have devised a most elegant solution.
Now onto the important part of the afternoon, wasting time while the dye bath soaks in. Sis and I had been planning a cutthroat game of Cocktail Croquet for awhile, also a fun summer activity.

Side note? Croquet mallets make excellent zombie weapons... Just sayin...
It was more cocktail than croquet, as we couldn't find the actual instructions we ended up just playing prison rules. Which means lots of extra shots, mulligans, and do overs when the dog (or us) would rip out the wickets.
When enough time has passed (The longer it sits, the darker it'll be, up to you), take it out of the dye bath and wash it out. I had a garden hose at my disposal, so I sprayed it off for a bit then dunked it in some clean water.

So wound up, you need to relax.
 
I alternated sloshing it around in clean water until it turned blue, then again in some fresh water until it stayed clear. Again, nice reason to do all this outside. Although if you're inside, a bathtub works great for this step.

 One of these things is not like the other...

Ta daaaaa! Unfurl your masterpiece and let it soak in the sun.

 Excuse me, do you know where the nearest drum circle is?

My favorite part is seeing what kind of cool pattern you get after all the twisting and rubber banding, you never really know until it's finally done.
For the first couple washes don't put it in with a bunch of white t shirts, most likely it's going to run for a bit. You can also run it through the dryer first to heat set the color, but I'd still recommend keeping it away from impressionable young clothes until it's had a chance to mature.
Until next time, happy crafting!

Wednesday, July 13, 2011

Coastahs with the mostahs

Hi folks, another craft coming at ya. I'm always looking for projects that I can finish in one afternoon, my attention span doesn't span that much longer. This one is perfect, we just painted a table we found for free on the side of the road, and are trying to keep it nice by using coasters. Unfortunately for us, we have no coasters.
I've been carrying around these two pieces of cork I got at a yard sale a loooong time ago, and was going to use them for trivets. But instead I kinda like the idea of having extra large coasters for a couple of drinks, or a nice glorious bowl of mac n cheese. Class is the name of the game after all...

This is why I can't have nice things...
 
Please forgive my sad looking little ink pad, obviously I don't treat my craft supplies as well as I should. These little colored triangles slide out so you can use them individually, probably one of the best ink-related purchases I've made in recent years.
I didn't really go into the design having a plan, I just started stamping and saw where it took me. When I plan out designs I often get so caught up in what looks perfect that I never actually get around to doing the craft. But if I take it slow and eke out just a little bit of a design at a time, it turns out more lovely than anything I could've planned.

 Cork it to me, buddy...

I wanted to do a Navajo inspired design, but I got kind of a mix of that and a space-agey type look. I'm thinking about stamping the other sides of both coasters as well, just so people have a lot of options when they're looking for the absolute most gorgeous coaster for their sweltering little drinks.
Once the ink dries on this side I'll give it a whack and post the end result here. Happy crafting!

Tuesday, July 5, 2011

Wham, bam, stamp you ma'am...

Heyoooo, it's been awhile since I posted anything, and I really need to get into the habit of crafting more than just once a month. It's tough though when you're in as committed a relationship as I am with your TV. But don't worry, I'm working on creating some boundaries...
I've been wanting to do stamping for awhile, and last night seemed like the perfect time. I always picture some crafts taking forever, but this one I banged out in a half hour, minus drying time.

 The always classy wrinkly wife beater, with 
fashion enhancing holes...

Tools: Screenprinting ink, tiny sponge triangle, and old wrinkly T shirt. I apologize for the state of my clothes, my folding technique involves balling things up and shoving them into drawers.

 Thank you IKEA for your wide 
array of cardboard boxes :)

Put some kind of layer in between the front and back of the shirt. Cardboard box or paper bag works fine, just to keep the paint from seeping through.

 Wanted to do a Navajo inspired design, this turned out a little 
bit more Puff the Magic Dragon.

I put some of the screenprinting ink onto a plate and dipped my sponge triangle into a thinish layer. Not too thin or the print won't show up, but don't glob paint on or it'll seep, run and take forever to dry.

I like the simple shapes because they're easier to cut out and work with, and honestly you can make some of the most beautiful designs using just one or two really basic shapes. Also the simpler the shape of your sponge, the cleaner your lines will be when you stamp them on the fabric.

As you can see I wear my  T shirts 
until they disintegrate or just turn into a puff of smoke...

I did a set of these shapes all down both sides of the shirt, and all along the bottom hem. Wait for one side to dry before flipping it over to do the back, the ink can easily smudge and send you into ruined craft rampage.

I was on a roll so decided to cut out a little houndstooth stamp as well and try that on another shirt. The toothpicks help me pick up and stamp down the sponge as it can get a little smushed from pinching. Some serious crafters like to affix their sponge stamps to blocks of wood to really get a firm press on the whole stamp, but that's a little bit too much work for me.

Please ignore the exposed wires in my living room...

 Once you've finished stamping it's a good idea to heat set the ink so that it won't come off in the washing machine. You can either use a hair dryer to set the ink, keeping it a foot or so away from the shirt and blasting it from the inside and outside of the shirt, or throw it in the dryer once the ink isn't sticky anymore.

Either way, a small amount of ink may come off once you wash the shirt, but that adds to the punk allure of the whole project. I find it's much easier to accept little mistakes in crafting rather than fight them, and in most cases it ends up enhancing the final piece and making it much more unique than if it turned out perfect.

Here's a couple different variations that you can do with easy shapes. The houndstooth turned out more space invader than anything else, but hey I'll take it.

 Now all I need to do is find some pants :)

 Oscar approves, though slightly confused.